How to write a trading plan: a four-line card before each Binance order
While you are still practising, a trading plan doesn't need to be a system. It needs to be a card — one per trade, four lines, written before you touch the order box: how much goes in and where you cut the loss; which order type and at what price; where the stop-loss and take-profit sit; and why you are buying. If any line stays blank, that trade doesn't happen.
After the trade closes you add a fifth line: did you follow the card? That line is the real output of practice. It answers whether you can execute a plan, which is the thing to prove before real money is involved.
In this article
Why a beginner's trading plan fits on one card per trade
A full trading plan template usually runs from goals, risk tolerance and trading style through to market selection. That framework suits someone who already trades regularly. Someone moving from demo to a first real trade has a narrower question: how do I place the next order, and afterwards, how do I know whether I improvised?
A card is small enough to finish in a few minutes, so it actually gets written. And it lines up with your trade history one-to-one. You can't reconcile a whole system against a single fill. You can reconcile a card.
Here is the card. Paper, a notes app or a spreadsheet all work:
- Size: putting in ___ USDT; exit if the loss reaches ___ USDT.
- Entry: limit / market; price ___ (for a market order, the last price on screen when you click).
- Exit: stop-loss stop price ___, limit price ___; take-profit stop price ___, limit price ___.
- Reason: one sentence, including what would make it wrong.
- Afterwards: size ✓/✗ · entry ✓/✗ · exit ✓/✗ · one note.
Line 1: how much goes in, and the loss that ends the trade
Two numbers, both in USDT. Not percentages — an order box won't take a percentage, but it will take an amount.
Working those numbers out is covered in how much to put in the first trade, and the first-trade size ruler does the arithmetic. One rule is specific to practice: the size you type on demo should match the size you intend to use with real money. Demo balances are large, and trading a casual slice of them trains the feel of a different position. Winning on demo, losing live puts this first on its list.
Once the amount is written, check the pair's minimum order value. If your card says less than that, the order gets rejected outright; order rejected? shows where to look.
Line 2: limit or market order, and the entry price
This line makes you choose the order type before the order box is open. For a limit order, write the price you're willing to trade at. For a market order, write the last price on screen at the moment you click — not because you'll get it, but because you'll compare the fill against it later.
On the trading screen the two types are neighbouring tabs, and one slip turns one into the other. Your first session has you place one of each; this line is the written version of that exercise.
Say your card reads "limit buy at 100", the order sits unfilled, and you switch to market to chase it. That trade gets a ✗ in the entry box. Changing an order isn't wrong in itself, but the change has to be one the card allowed — for example "if it hasn't filled in two hours, cancel and stop for the day".
Line 3: stop-loss and take-profit as numbers you can type in
This is the line most likely to turn into a wish. "Get out if it drops a lot" fits no field anywhere. Write the fields that exist.
Binance's help page "What is The Stop-Limit Function and How to Use It?" defines two prices. The stop price: when the asset's price reaches it, the stop-limit order is executed. The limit price: the selected (or potentially better) price at which it is executed. So each exit on your card gets two numbers, and they map straight onto those two fields (checked October 2026).
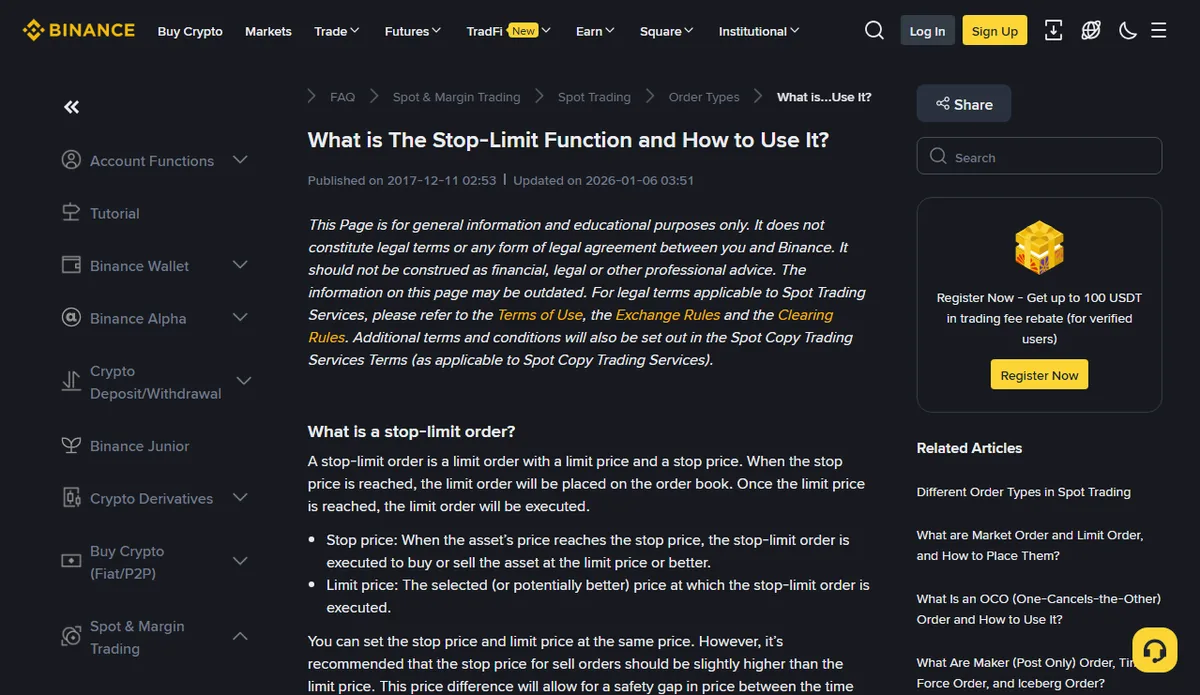
Further down, the same page makes two points worth copying onto the back of the card. It recommends that for sell orders the stop price be slightly higher than the limit price, which leaves a safety gap between the trigger and the fill. And it warns that the order may never be filled if the market price can't reach the limit price you set. Put together: a stop-loss whose limit price is glued to its stop price can trigger and then sit there unfilled while the price keeps falling. How wide a gap to leave depends on how far that pair usually jumps. Write the number you chose, then check afterwards whether it was enough.
An exit can also be a time, not a price: "if neither line is hit by Friday's close, close it by hand". That reconciles just as well. How to actually place both orders on demo and find them afterwards is in practise stop-loss and take-profit on demo.
Line 4: a reason to buy that could turn out wrong
"Feels like it'll go up" is a sentence, but nothing can ever disprove it, so it can never be checked. A usable reason carries a condition under which you'd admit it was wrong.
- Doesn't belong on the card: "this coin is everywhere right now".
- Belongs on the card: "price is back near last week's low and has stopped falling, so I buy near there; a close below that low cancels the idea".
The second one isn't necessarily a good reason. Its value is that it locks onto line 3: the price that cancels the reason is usually where the stop-loss belongs. If the two disagree — the reason fails below A but the stop sits far under A — the card shows you the hole before the market does.
One more case. You finish the card, and before you even open the order box the reason has already failed. That card is void. Don't nudge the numbers until it fits.
After the trade: did you actually follow the plan?
When the trade is closed, hold the card next to the fills and tick each box:
- Size: quantity times fill price — does it match line 1?
- Entry: same order type as the card? For a market order, how far was the fill from the price you wrote down?
- Exit: did a price from the card trigger it, or did you click? If you clicked, did the card allow for that?
On demo, this step is manual. Binance's "How to Use Binance Demo Trading?" page says order details for demo trades are not available, not even to Customer Support, and lists export features among what futures demo doesn't support (checked October 2026). So copy each fill price and quantity down when the trade closes rather than at the end of the month. The card and the five numbers of your practice log can share a row: the card is the half you write before the order, the log is the half you fill in after.
After twenty or thirty cards, count how many have all three ticks. That ratio says more about readiness than your returns do, because returns include luck and following the card doesn't. The "explain your losses" test in the three readiness tests leans on the card too — without one, a loss can only be compared against a vague memory.
If you can't fill a line, don't place the trade
Each blank line points at the part you haven't thought through:
- Line 1 blank: you don't know the worst case. With real money, this is the most expensive gap.
- Line 2 blank: you'll decide inside the order box, flipping between limit and market.
- Line 3 blank: you'll decide when to leave only after you're in, which usually means holding on.
- Line 4 blank: the price itself pushed you into the trade.
Stopping at one blank line sounds strict. On demo it costs almost nothing — a skipped trade with play money. Build the habit there, and when the readiness checklist asks whether you write an exit condition before you enter, you'll have a stack of cards to show for it. Your demo results prove little on their own; the bottom of Binance's demo page says as much, calling demo performance not a reliable indicator of future performance or returns in live trading. The cards prove something else: you thought before you clicked.