Practise stop-loss and take-profit orders on Binance demo first
A stop-loss and a take-profit are the same tool pointed in two directions: an order that waits out of sight until price touches a line you chose, and only then steps into the market. The demo account is where you find out where that order sits while it waits, what it turns into once it fires, and why firing is not the same as filling.
Four drills below, in order. Budget about an hour, split over two sittings if you like. By the end you should be able to answer three questions without scrolling back: which list the order lives in, what it becomes after the trigger, and where to look when it did not fill.
Four drills
How a stop-limit order works: stop price, limit price, amount
Taking Binance spot as the example, the help centre page "What is The Stop-Limit Function and How to Use It?" puts it in one line: a stop-limit order is a limit order with a limit price and a stop price. The order form gives you exactly three boxes:
- Stop — the line. Until the market touches it, nothing goes to the order book.
- Limit — the price of the limit order the system places for you once the stop is hit.
- Amount — how much to buy or sell.
The first two boxes look alike and do different jobs. Stop decides when you act. Limit decides the worst price you will accept when you do. The gap you leave between them is the real subject of this whole session.
There is no separate "take-profit" button on spot, either. On the sell side, a stop below the current price works as a stop-loss; a stop above it works as a take-profit. Same order type, same form.
Drill 1: place a stop-loss on demo that will trigger soon
Buy a small amount with demo funds first, sized the way you would size a real first trade — not a big number just because the money is pretend. You cannot practise a sell-side stop on a coin you do not hold.
Then follow the help page's path: the Spot screen, [Sell], order type [Stop-limit] (the app labels it [Stop Limit] in a dropdown). One caution before you go looking. Binance's "How to Use Binance Demo Trading" page says you can practise spot and futures, but it does not list which order types the demo offers. So the first job is to check your own order form: is Stop-limit there? Is OCO? If not, don't fake drills 1 and 2 with plain limit orders. Both drills put the stop below the current price, and a limit sell priced below the current price fills at once, so it can't act as "sell only if it drops". A plain limit sell can only stand in for the take-profit side in drill 3, where the order sits above the current price; leave drills 1 and 2 until Stop-limit shows up.
Fill it in like this: a stop just under the current price, close enough that ordinary wobble will touch it; a limit a hair below the stop; the amount you just bought.
Then stay and watch two things:
- Find it under [Open Orders], which is where the help page says active stop-limit orders appear. Note how its type is shown compared with a plain limit order.
- Check the coin's available balance before and after placing it. Just write down what you see. It is the picture to recall the first time a live account tells you the coins are there but you cannot sell them.
Wait for the trigger. Afterwards, check [Open Orders] and [Order History] again and see which side the order ended up on. If price refuses to move, cancel it, nudge the stop closer and place it again. Cancelling and re-pricing count as part of the drill.
Drill 2: stop-loss triggered but not filled — reproduce it on purpose
This is the drill worth the hour. The help page carries two sentences that sit after the step-by-step and are easy to skim past.
One: reaching the stop price only indicates that a limit order is activated — it does not mean the order fills straight away. Two: if you set the stop-loss limit too high or the take-profit limit too low, your order may never be filled, because the market may not reach your limit price.
Build that on demo. Sell side again, stop just below the market as before — but this time put the limit above the stop.
Think it through before it happens. Price drops to the stop, the order wakes up, and what it places is a sell limit priced higher than where the market now trades. Price is heading down; nobody pays you more than market. The order sits there. You meant "get me out if it drops to here", it dropped through, and you are still in.
After it fires, look at its status under [Open Orders] and compare it with the drill 1 order. Then cancel it.
This is one honest route to "I had a stop and still lost more than I planned": the line was touched, the order appeared, and the limit price blocked the fill. There is no universal right gap between stop and limit. It depends on how far that pair tends to jump in one move. Too narrow, and a fast drop can leave the order hanging; too wide, and the fill can land well below what you pictured. Demo fills do not come from the real order book, so what you are training here is knowing this exists and where to look — not a number you can copy into a live account.
Drill 3: how to set a take-profit order above the price
Flip it: sell side, stop above the current price. That is your take-profit. The limit usually goes at or a little under the stop. Work it through for a sell: put the limit far above the stop, and if price touches the stop and falls back, the order can sit there unfilled. A low limit fills easily, but you may sell well under the level you were aiming for. The help page also files a take-profit limit set too low under "may never be filled"; the sell-side logic doesn't lead there, so if you're unsure, place one on demo and watch what happens.
This one probably will not trigger soon, which is fine. Leave it working and do two things:
- With a drill-1-style stop-loss also resting, see whether your available amount even lets you place this second order. Both want to sell the same coins. Find out for yourself whether the balance runs short.
- Come back later and check it is still under [Open Orders]. Closing the tab does not cancel a resting order, and that is just as true with real money.
If the balance would not stretch to a second order, you have just walked into the problem the next drill solves.
Drill 4: how an OCO order works — one fills, the other cancels
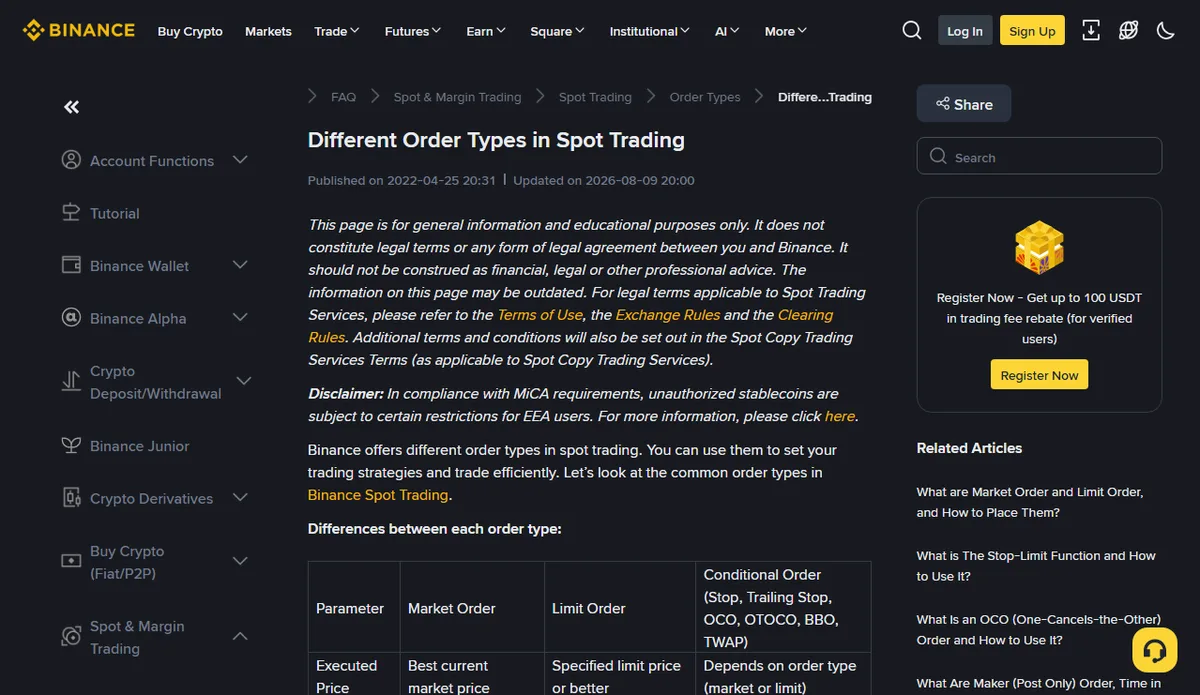
That problem — wanting both a stop-loss and a take-profit while the same coins can only back one sell order — is exactly what OCO is for. Binance's "Different Order Types in Spot Trading" describes it this way: a One Cancels the Other order combines a limit order and a stop-limit order; you place two orders at once, and as soon as one is triggered, the other is cancelled.
If your demo form offers OCO, place one: the upper leg is the take-profit limit, the lower leg is the stop and its limit. Then open [Open Orders] and count how many lines it shows as.
Wait for either side to go. When it does, there is one thing to check: did the other leg really disappear? Find its cancelled record in [Order History]. Once you have watched that automatic cancel happen, you stop worrying about both legs filling and selling twice what you own.
No OCO on your demo? Do it by hand: the moment the take-profit fills, go and cancel the stop-loss yourself. One manual run is enough to feel what a few seconds of delay would cost in a fast market.
Checking stop order history: four prices to note each time
The demo help page is blunt about it: Demo Trading does not provide detailed order information, and customer support cannot retrieve or verify demo orders. If you do not write it down, it is gone.
For each conditional order you practise, record:
- the market price when you placed it
- your stop price
- your limit price
- the actual average fill price (or "not filled" and why)
The distance between 2 and 4 is what that stop actually cost at that moment. Line up a handful of these and you will learn more about where to put stops than any rule of thumb gives you. For the full practice log, five numbers per trade has a short format; these four prices slot straight into it.
What demo practice cannot teach about stop-losses
Buttons, lists, where the order goes after the trigger — the demo shows all of that clearly. The half it cannot cover happens to be the hard half.
Fills. Demo matching is not the real order book. Whether a stop-limit would fill during a fast drop on a live account, and at what price, is not something the demo can answer reliably. Demo versus live: five gaps goes through differences like this one by one.
Your hand. With pretend money at the stop line, you let it run. With real money there, the urge is to cancel the stop or drag it lower and wait a bit. The demo cannot train that moment, so write a rule into your log now: once a stop is placed, it may only move in your favour, never further away. On your first real-money day, check yourself against it.
Futures. Take-profit and stop-loss on futures follow different rules from spot, and leverage brings the line much closer. Read what leverage really changes before practising the futures version. Crypto prices swing hard, and with leverage losing your entire margin is entirely possible.
When you can run all four drills without the article open and have a few rows of those four prices, "can use a stop-loss" belongs among your readiness tests. To tick it off formally, use the readiness checklist.
The three Binance help centre pages quoted here are public and were checked in October 2026: "What is The Stop-Limit Function and How to Use It?" (published 2017-12-11), "Different Order Types in Spot Trading" (shown as updated 2026-08-09) and "How to Use Binance Demo Trading" (published 2025-09-11, updated 2025-10-15). Button labels follow those pages. If your screen differs, work from your screen; for the rules, the current version of the help page is what counts.